


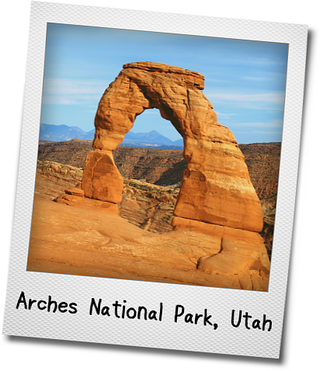
We all can appreciate a good arch, mouth open, laughing at gravity. Natural arches are nature’s own version of an exquisitely carved fruit display. Imagine a master fruit carver skillfully slicing and shaping a melon or pineapple into intricate, patterns and elegant designs. Each careful, masterful stroke working with the natural strength and texture of the fruit to make its full potential shine. Similarly, natural arches are sculpted by the slow and steady forces of erosion and weathering. Over time, these forces carve away layers of rock, creating stunning, naturally occurring arches that echo the artistry of a skilled carver. Follow the step-by-step “recipe” to uncover the process shaping these remarkable geological formations, where nature’s erosion techniques work like a sculptor’s knife to reveal these breathtaking arches!
Arches (Sandstone Style)
Temperature
Ambient
Pressure
Ambient
Size.
10s of cm – 10s of m
Time
Thousands of years +
Directions
Step 1
Place a sandstone block and cover it with other rock blocks.
Step 2
Apply pressure to the sandstone block until it cracks into low angle fractures, between horizontal and 45 degrees.
Alternative-Place a new rock block, with a different texture, on top. Make sure there is a sharp line between them.
Step 3
Stop the external pressure and allow the block to resettle.
– The stress of gravity will now be strongest on the upper line of the fracture or the sharp contact between two rock layers.
-The microscopic grains along the top line of the fracture will shift under the stress of gravity and lock together to gain strength.
Step 4
Remove rock blocks covering the now fractured sandstone layer.
Step 5
Allow the sandstone to expand and form vertical cracks as it does.
Step 6
Use wind and water to cut the sandstone block into fins (strips) along the vertical cracks.
Step 7
Continue using wind and water to slowly narrow the fins.
– As the fins become thinner, gravity will stress the area above the fractures more, making it continually stronger.
Step 8
Once the fins are sufficiently thin, begin forming holes (windows) by collapsing weaker areas (Where fractures intersect or where there are no fractures.(Now weaker than the fractured zones.)).
Step 9
Continue carving the fins with wind and water as a window grows to reach the strong fracture or contact line. Slowly, a critical point is reached, where the vertical stress caused by gravity on the fracture line becomes stronger than the horizontal stress caused by wind and water. Wind and water will eventually stop carving the rock, leaving the window in the shape of an arch over the contact line.
Materials
- Block of Sandstone
Tools
- Wind & Water